With the balancing process there are three steps. You will first want to balance your tilt axis (two parts to this step), then the roll axis and lastly the pan axis. Please see below for how to do this.
1a. Level Adjustment on Tilt Axis
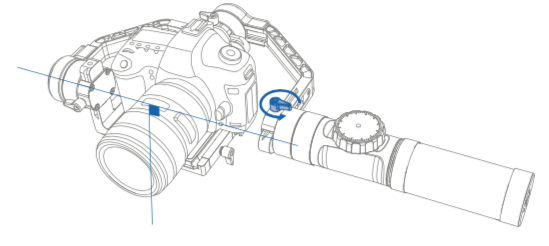
Loosen the thumb screw on the quick release plate so that it can slide forward or backward (see image below).
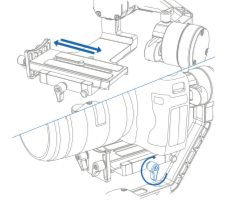
Hold the horizontal arm on the Tilt axis with one hand and adjust the position of the camera to find a level balance where the camera can stay still and almost level with its lens facing to the front. Complete this step by tightening up the camera mounting thumb screw (see image below).
1b. Balance Adjustment on Tilt Axis:
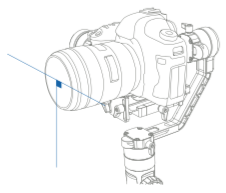
Loosen the thumb screws (rotate about 3 times); adjust the tilt axis until the camera can stay still with the lens facing up (i.e. the camera stays still and vertical to the ground). Complete this step by tightening up the thumb screw (see image below).
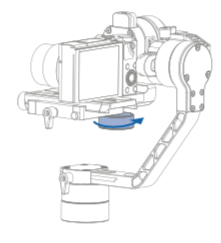
2. Balance Adjustment on Roll Axis:
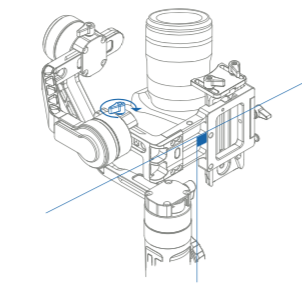
Loosen the thumb screw (rotate about 3 times). Adjust the Roll axis until the camera can stay still. Complete this step by tightening up the thumb screw (see image below).
3. Balance Adjustment on Pan Axis:
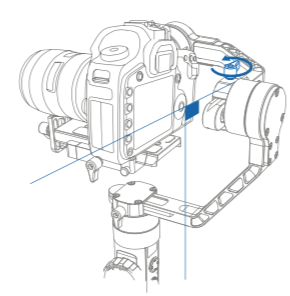
Loosen the thumb screw on the pan axis. Adjust the pan axis until the camera can stay still while keeping the vertical level wen turned to the right & the left side. Complete the balance adjustment by tightening up all the thumb screws (see image below).
Side Note: If the camera installed is too light that it's impossible to achieve balanced adjustment, please purchase the dedicated counterweight (100g) provided by EVO Gimbals and install it under the camera mounting plate to finish balance installation (see image below).
Comments
0 comments
Please sign in to leave a comment.